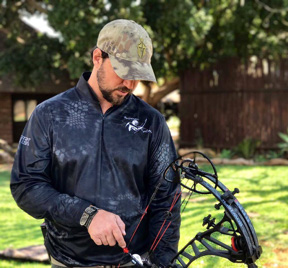
Here are five factors you may want to take into consideration during the setup process of your bow that can pay off big in improving your bow’s accuracy output.
Customizing Contact Points
When shooting a bow, there are three main contact points: the grip, the release on the bowstring, and the string against your face and/or nose. All need to be perfected for extreme shooting consistency.
The grip is perhaps the most important, and it should provide a comfortable, torque-free engagement. A worthwhile grip is somewhat narrow in shape, so you can consistently place your hand in the same spot. Every set-up bow allows for complete relaxation at full draw, with only a very light touch of the bowstring against your face and/or nose.
Improving Balance
All else being equal, a balanced bow usually shoots the best. Professional target shooters know this all too well, as do expert bow engineers, which is why they’re always reengineering bow-riser geometry in an attempt to find that magical shape that improves weight and balance.
Unfortunately, due to brace-height position, bow accessories, and overall placement of the arrow shelf and arrow path, a bow that balances perfectly right out of the box is nearly impossible. Therefore, customization is needed via counterweights and stabilizers. Every stabilizer company makes small counterweights and brackets that you can use to “trick out” your bow and improve holding balance.
For best results, a well-balanced bow should hold perfectly plumb in your extended hand, not tilting to the left or right. A forward tilt caused by a front-mounted stabilizer is not a bad thing, if it remains comfortable and doesn’t cause an excessive “down pull” as you aim. You must experiment to determine what’s right for you.
Harmonizing Cams
Every bow has a specified “sweet spot” in terms of how the cams should be oriented or positioned at rest, and in the full-draw position. Reference your bow’s owner’s manual or contact the manufacturer directly. Maintaining this cam positioning is vital for a quieter, more accurate setup.
Also, it’s critical that the cable harnesses contact the draw stops in unison, or one should hit slightly before the other to allow for an improved dynamic tune.
There are two things you can do to refine cam synchronization. Get a bow-drawing device, so you can precisely check each cable’s contact points at full draw, and periodically check these to ensure increased consistency. Second, you should “creep-tune” your bow by shooting several arrow groups at a 20-yard horizontal strip of tape. To begin with, shoot three to five arrows by holding “slightly off the wall,” and record the results.
Next, shoot another group of arrows, but this time “pull hard into the wall” and recheck arrow impact. If the arrows hit high pulling hard into the wall, place the bow in a press and twist the control cable on the top cam’s peg one-half twist, then cycle a few extra arrows through the bow to settle in the strings before attempting another arrow grouping on the tape. If the arrows impact low, twist the bottom cam’s buss cable one-half twist. Ideally, you want both groups of arrows to strike in relatively the same spot (closer together vertically). This will yield the most forgiving setup possible.
Optimizing D-Loop
Most bowhunters don’t put too much thought into the length and shape of their D-loop. However, it can be a contributing factor of horizontal string torque, depending on the style of release aid you use and how you anchor at full draw.
An ultra-short loop can cause undue string twist when using release aids that don’t allow rotation of the connecting head. Also, T-handle releases (thumb trigger or back tension) that use a rigid hook closure also require a longer loop for a more torque-free shot.
This is one reason why some bowhunters prefer a wrist-strap release with a flexible nylon connecting strap, or one with a head that allows for a full 360-degree rotation. Generally speaking, you need a string loop that allows for at least a half-inch extension in length when using a standard wrist-strap release. With T-handles and non-rotating heads, a three-quarter-inch minimum is best. You should experiment to determine which size yields optimum shooting consistency.
Refining Nock Fit
Proper nock fit is often defined as a snug fit, with a positive click on engagement, but not so snug that you can’t slide the nock easily up and down the serving with light pressure or rotate it 360 degrees around the string without it moving the bowstring in any direction. Also, “snug” means no visible wobble or gap within the throat region.
Overall, some bowhunters like to err on the side of my arrows’ nocks gripping the string slightly too loose rather than slightly too tight. As long as the D-loop positively captures the nock and the fit can’t cause the arrow to pop off the string, this seems to yield great consistency with my setups.
Remember, to get the nocks to fit right, you may have to change the bowstring’s center serving to a thinner or thicker diameter thread, or you can try outfitting your arrows with nocks that feature a larger string groove. For a slightly looser fit with thicker center servings, I’ve had good luck using Easton’s 3D Super Nocks, or large-groove G Nocks.
Archery and bowhunting are disciplines that incorporate a lot of detail. By customizing and fine-tuning your hunting bow, you’ll heighten your ability to shoot better. This extra effort can pay off big, too, especially in those bowhunting situations that demand extra confidence and shooting precision.
If you are interested in bringing your improved bowhunting accuracy to South Africa for a bowhunting trip of a lifetime, contact Dani Anderson at 208.322.5902 or [email protected] or call 208.322.5902 to book your hunting trip to Bushmen Safaris in South Africa.
Portions of this article originally appeared on the Bowhunter.com website.